How I Built My Greenhouse from Reclaimed Materials

A little creativity, a lot of old windows, and a dream.
For years, I dreamed of having a greenhouse. Not one of those big, fancy kits—but something whimsical, soulful, and filled with character. I wanted it to feel like it had always been there. So I did what I always do: I started gathering reclaimed materials and made it happen.
If you’ve ever thought about building your own greenhouse but felt overwhelmed, let me just say—you can absolutely do this. I’m sharing exactly how I built mine so you can build one too, using what you already have or can easily find.
Step 1: Gather Your Materials
This part was kind of like a treasure hunt. I collected:
- Old windows in different shapes and sizes
- A pair of dreamy vintage French doors
- Reclaimed wood (including barn wood and old shiplap)
- A few new things like roof trusses and clear roof panels, or you can build your own trusses DIY style.
- Screws, brackets, hinges, and basic tools
I mostly used things from my personal cottage, but you can easily find things things on Facebook Marketplace, garage sales, architectual salvage and more!
Step 2: Pick the Perfect Spot
Sunshine is key, so I chose a sunny corner right behind my garage. It receives at least 12 hours of sunlight a day and is located near a water source. I poured a 10′ x 10′ concrete pad, but your size can vary based on how much space you have and how many windows you’ve collected.
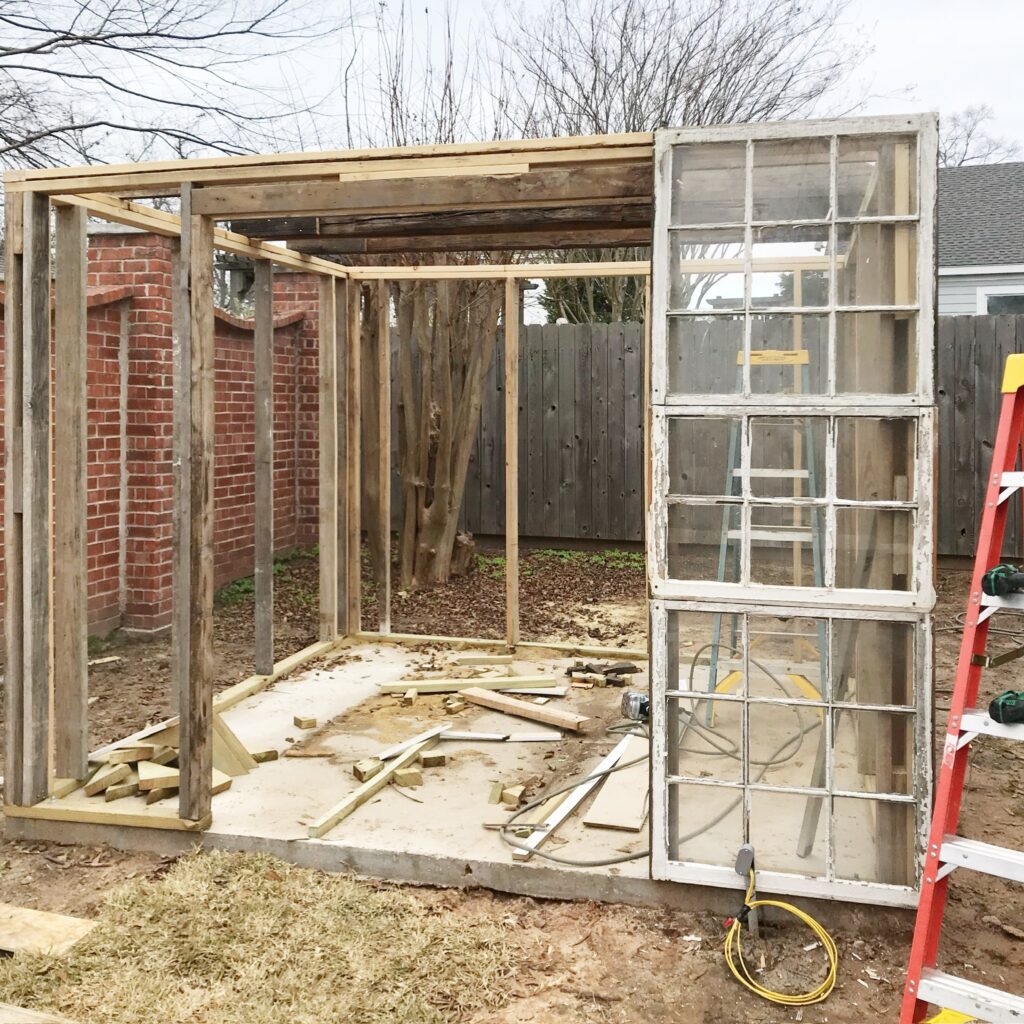
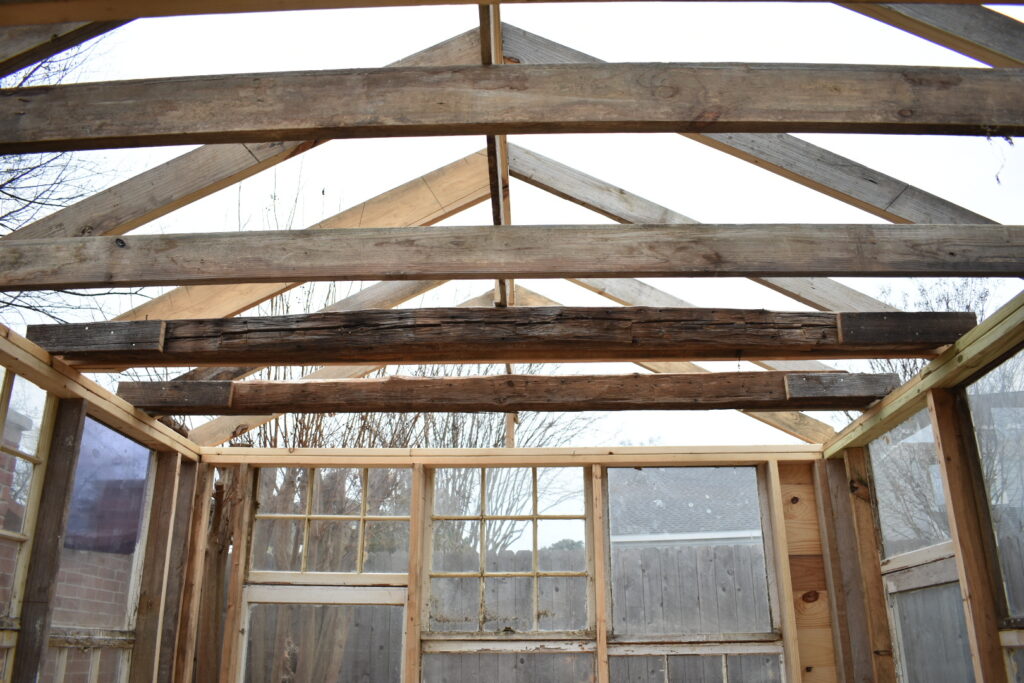
Step 3: Build the Frame
Even though I was going for a reclaimed, vintage vibe, I knew I needed strong bones. I used treated lumber to frame everything out (well actually Bolin Construction did ;):
- First, we added the concrete pad; you can also use gravel for improved drainage.
- Then Forrest framed the walls, leaving room for the windows and doors.
- Lastly, he added the roof trusses to support both the clear panels up top for sunlight.
Let me tell you—it was definitely a process, but watching it come together was so rewarding.
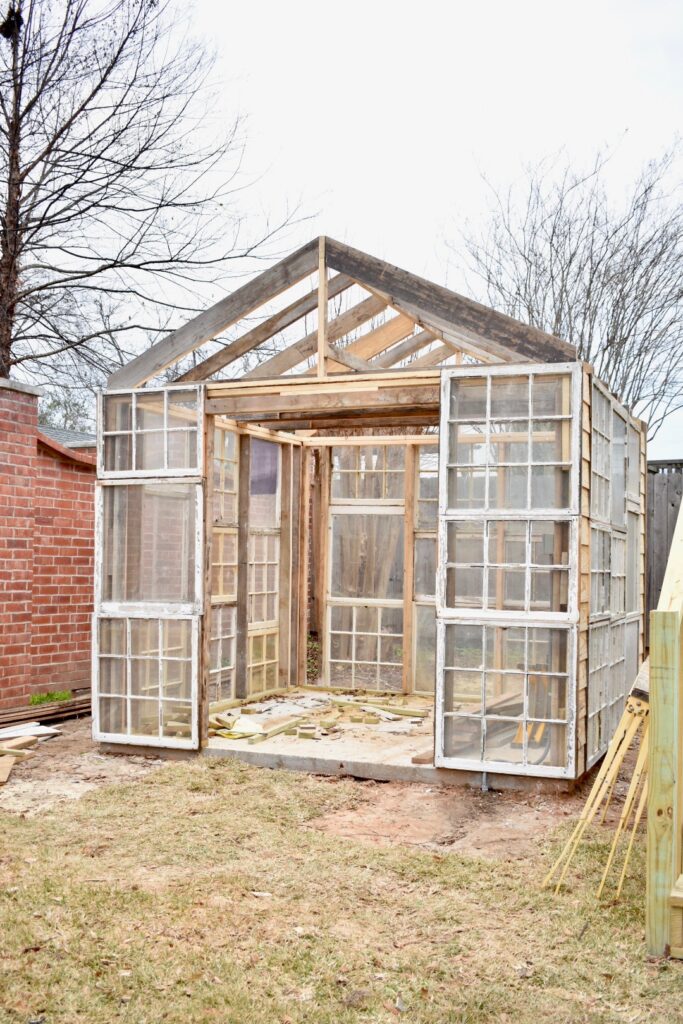
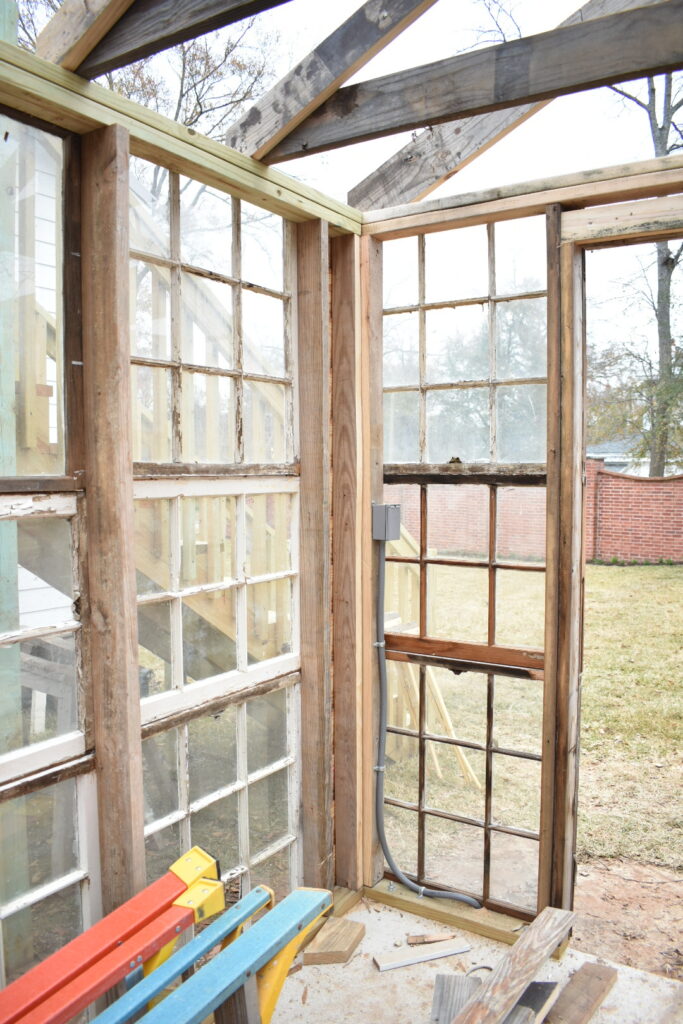
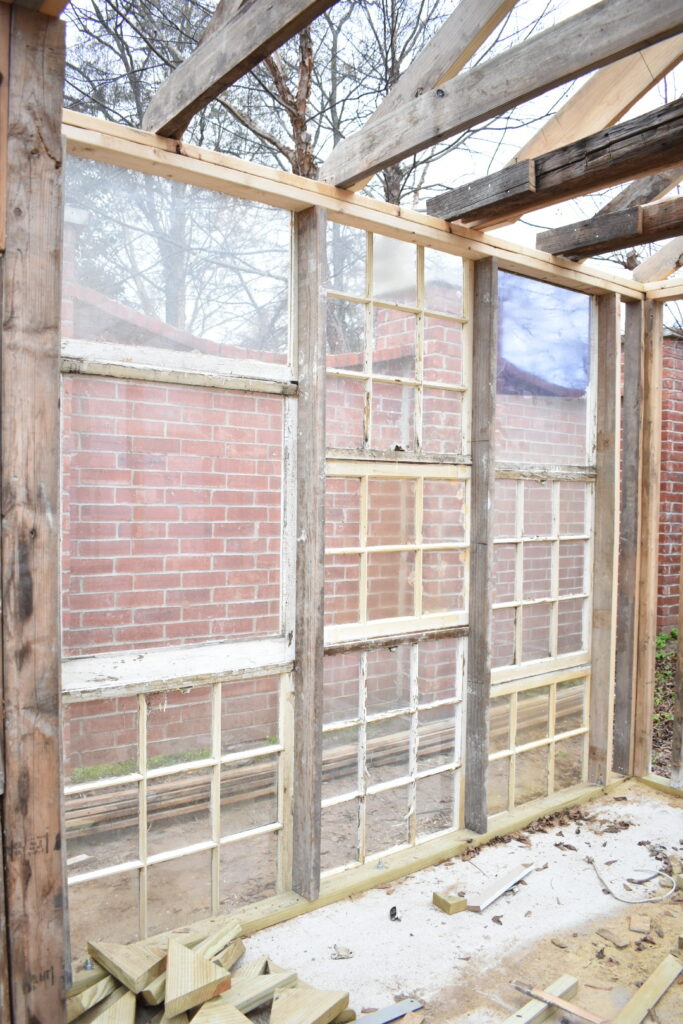
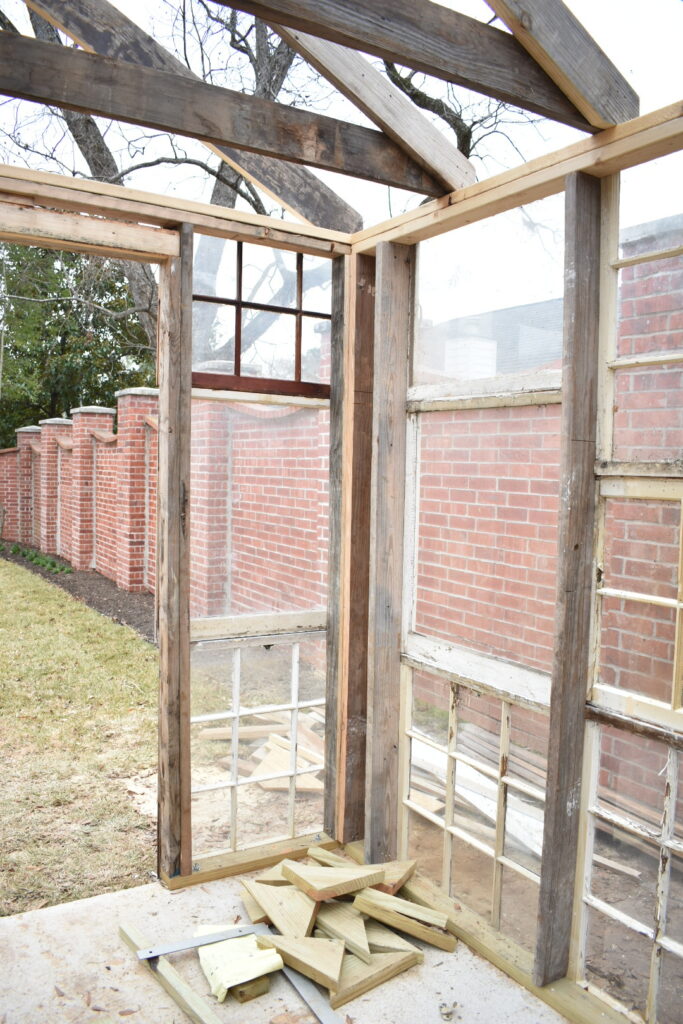
Step 4: We Installed the Windows and Doors
This might’ve been my favorite part. Forrest laid out all the windows like a puzzle and arranged them in a way that felt balanced but still had that charming, mismatched look I love.
- He used a level and secured each one with screws and brackets.
- We installed the vintage French doors right in the front—such a statement moment.
- Any odd gaps were filled with extra reclaimed wood and trim.
Was it perfect? Nope. But that’s exactly the point. The beauty is in the imperfections.
Step 5: Finish the Roof
I used clear, corrugated plexiglass panels on most of the roof. If you live somewhere chilly, you could definitely use polycarbonate sheets for insulation. Forrest made sure the roof had a good slope so water runs off easily—very important!
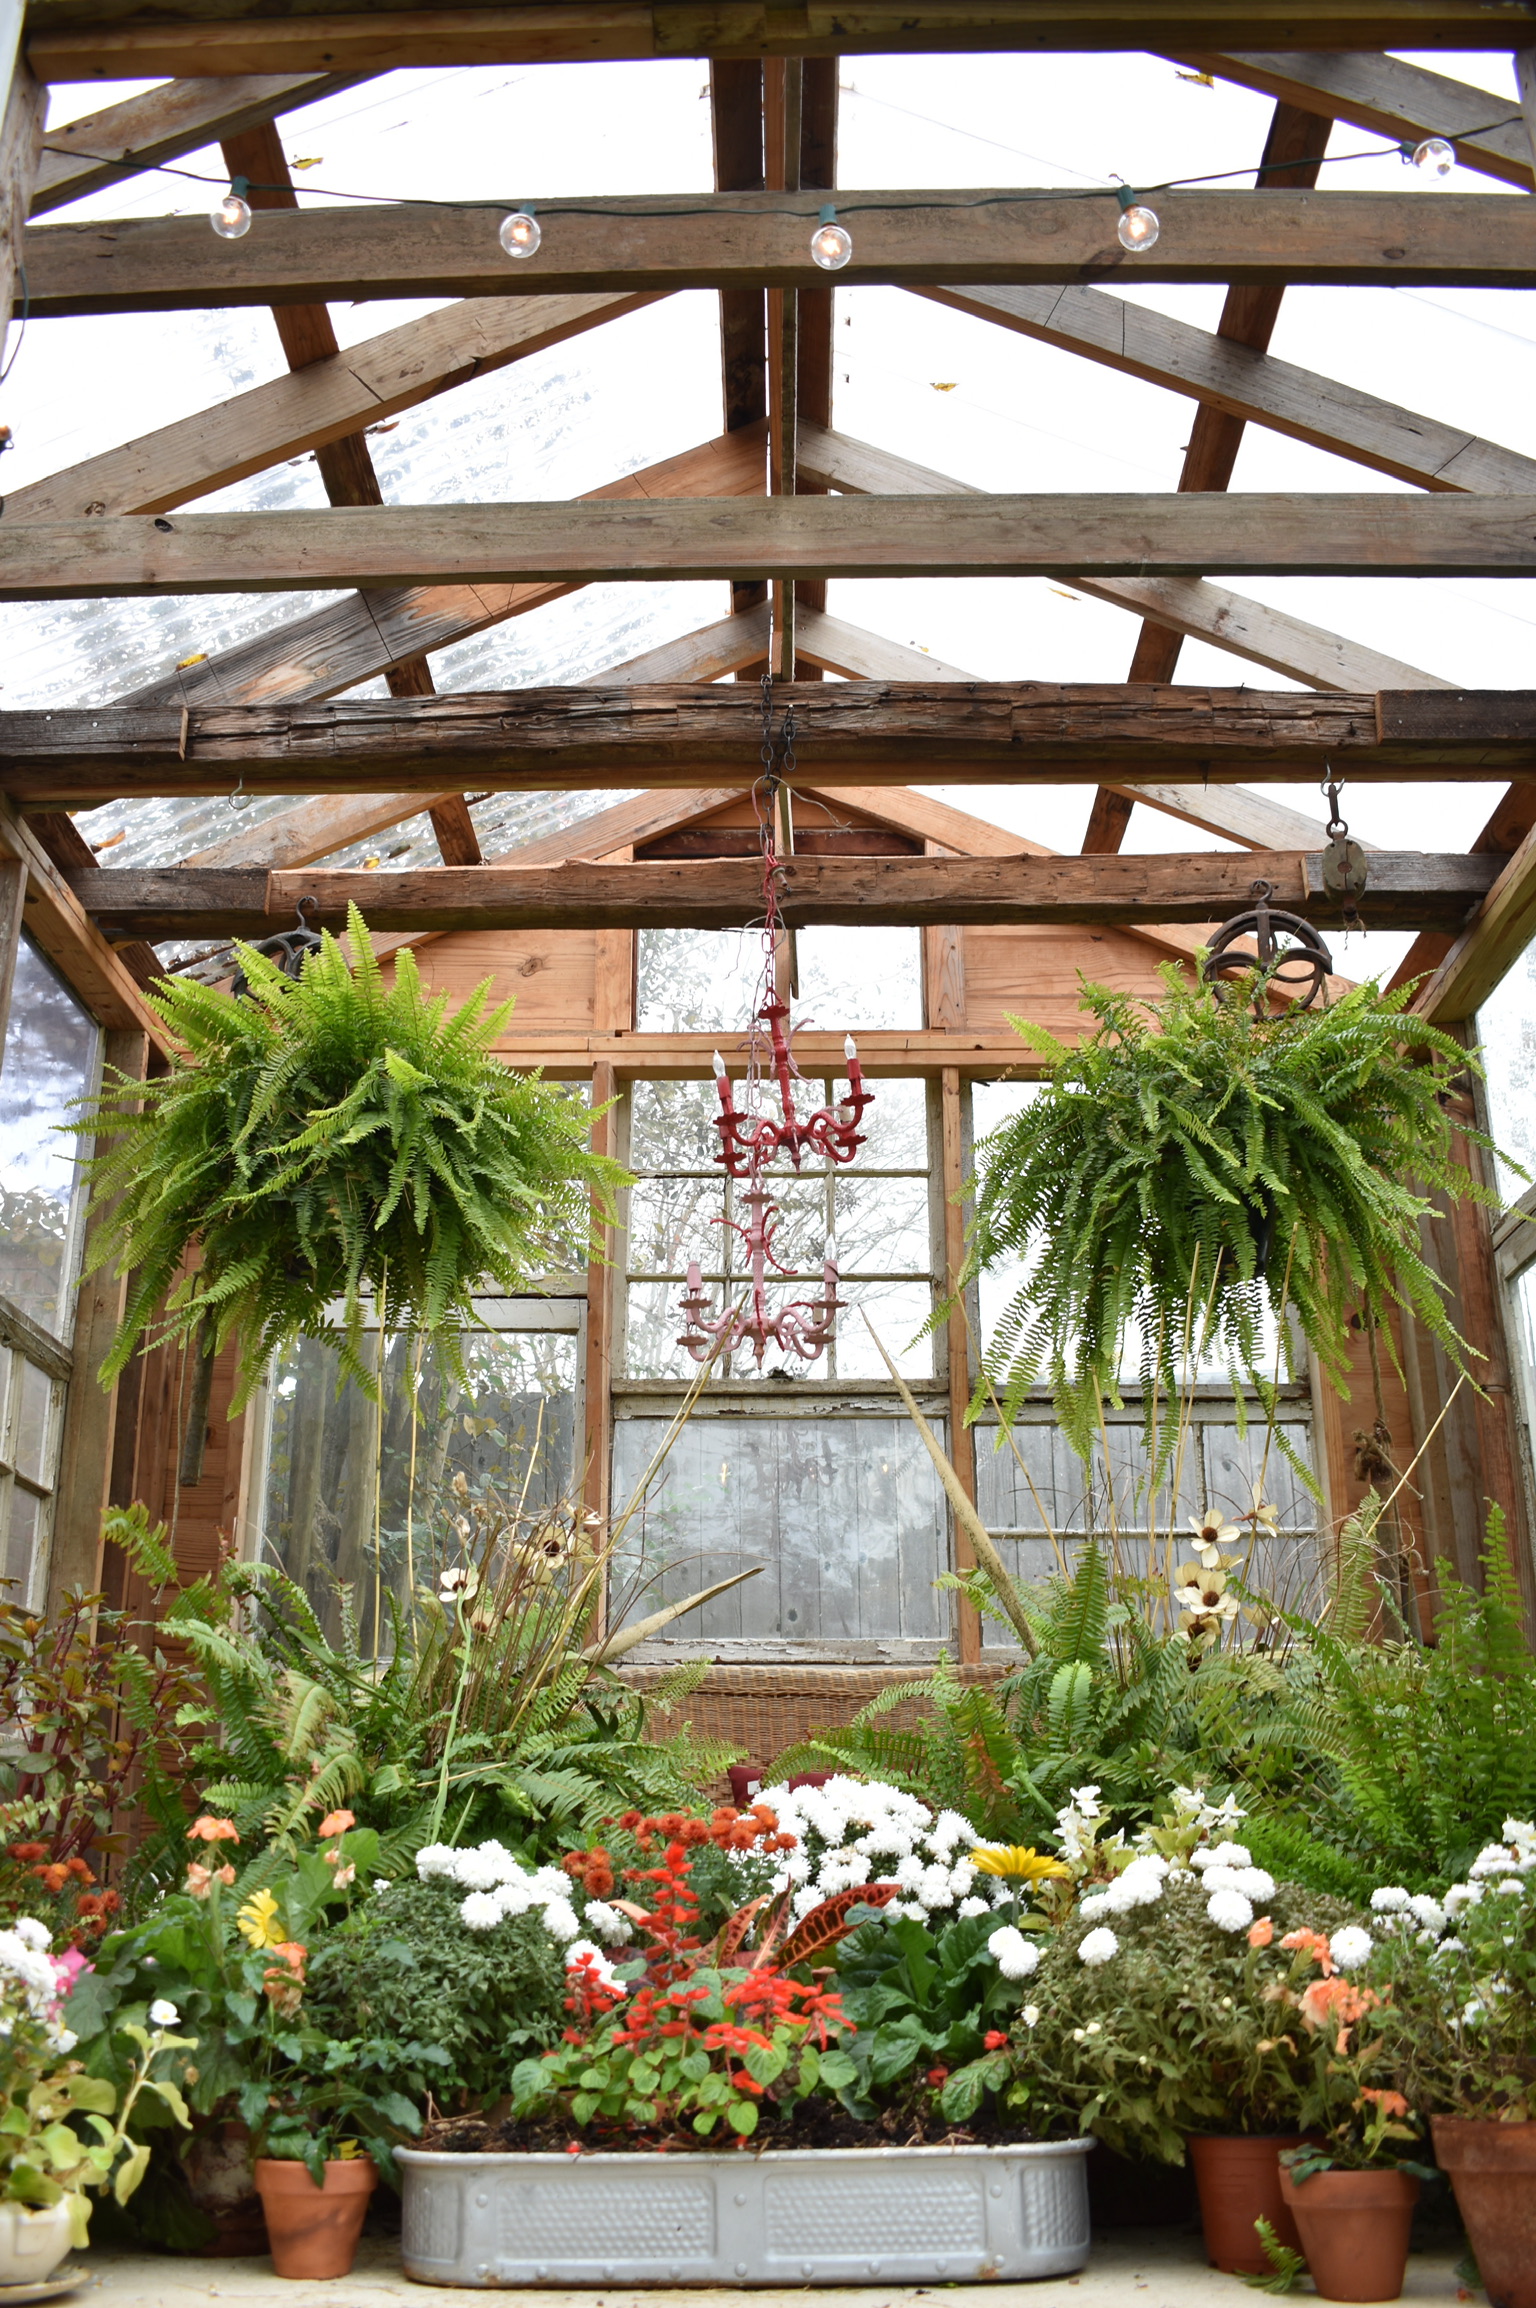
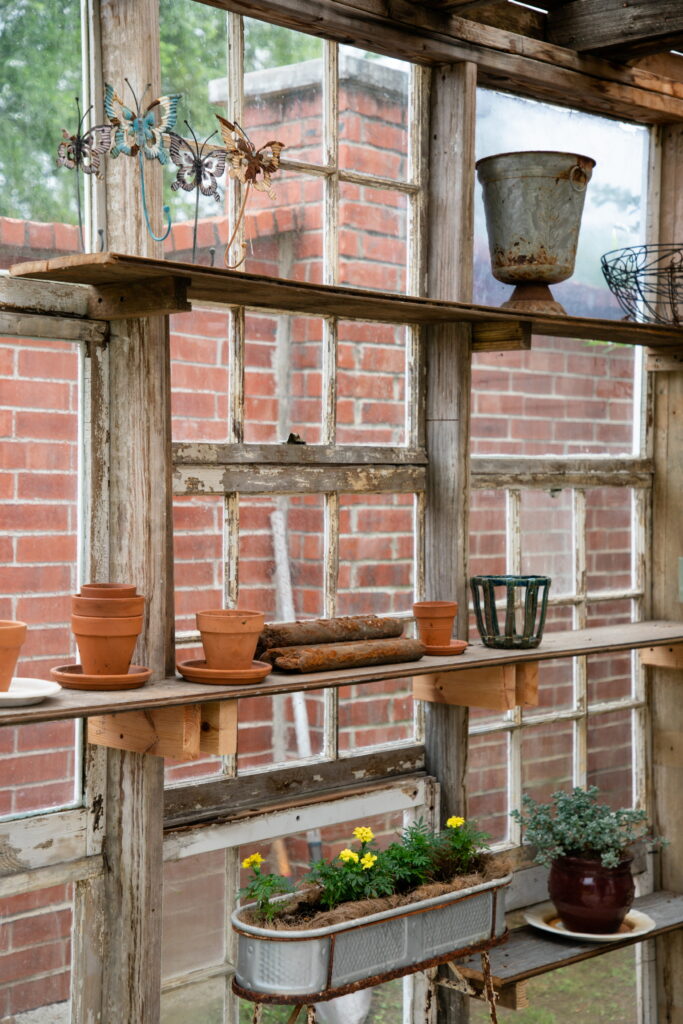
Step 6: Add Pretty Details
Now the fun really began.
- We used reclaimed beams from an old home for both style and support.
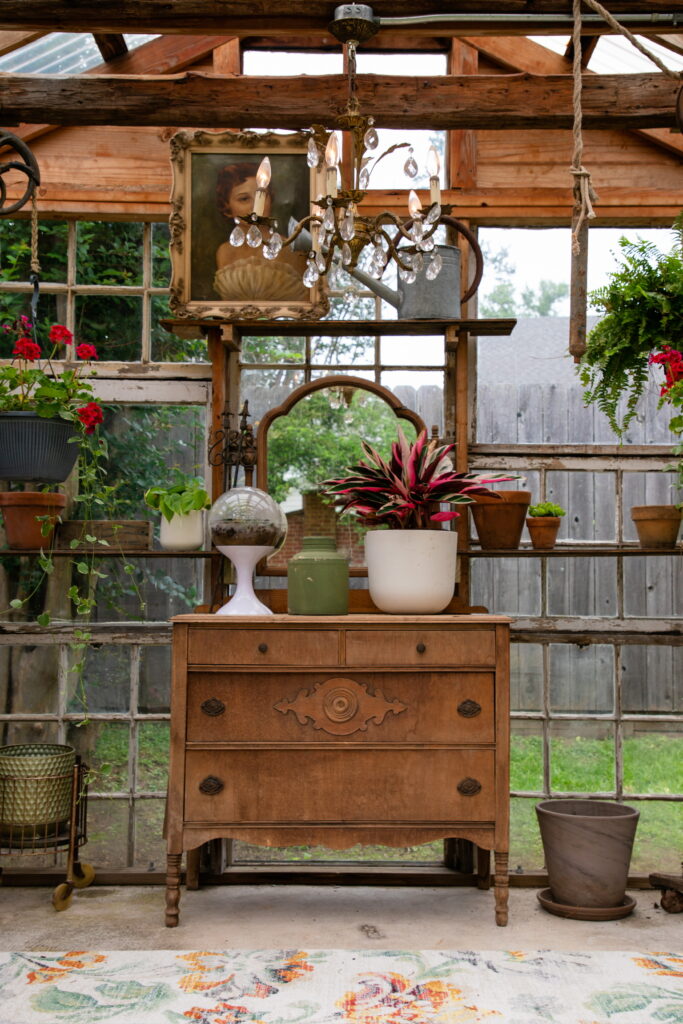
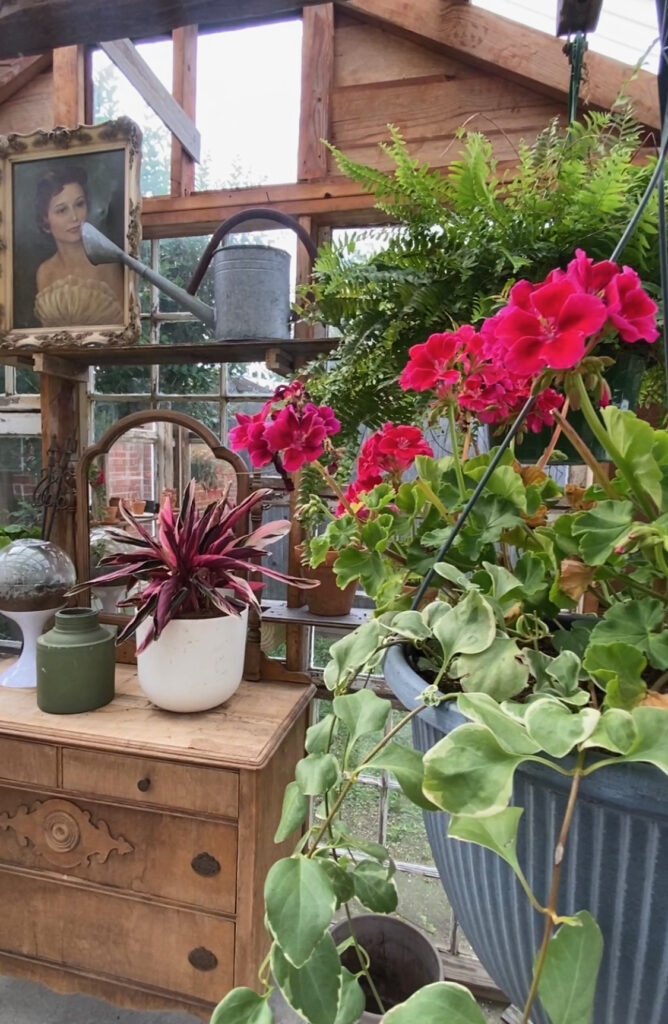
- I brought in shelves, garden tools, and even a little chandelier inside (yes, really and it works!).
- I sealed around the windows and joints with caulk to keep out any drafts.
- I used a “trashure” roadside dresser find for my potting bench and it is absolutely perfect!
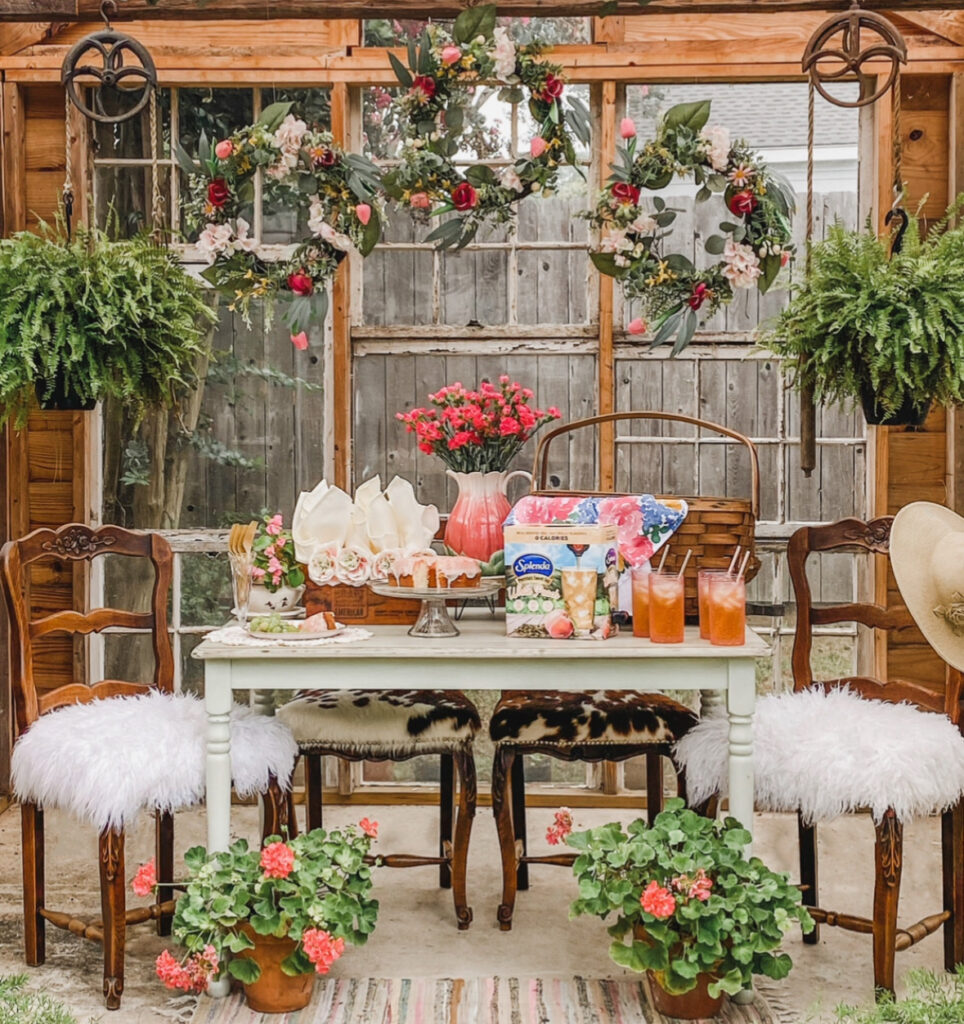
Step 7: Style Your Greenhouse and Start Planting
Once the structure was done, I started bringing it to life with plants, pots, and vintage touches. I’ve already planted herbs and cut flowers, and it’s quickly become my favorite little retreat. It’s not just a greenhouse—it’s a dreamy escape right in my backyard.
A Few Final Thoughts
This project was truly a labor of love. It didn’t happen overnight! We don’t have plans I can share because Forrest used his amazing contractor brain to create this from scratch! Every old window and creaky hinge has a story, and now they’re part of my story.
If you’re thinking about building a greenhouse from reclaimed materials, consider this your nudge to start. Start small. Start imperfect. Start with what you already have. I promise you—it’s worth it.
*This post does contain affiliate links from which I earn a small commission I utilize to help with the upkeep of this blog.
Thank you…. It’s beautiful! ❤️